Import and online shpo for not to common bike parts and accessories.
")
")
home/en tips-tricks How do I open a classic bottom bracket?
How do I open a classic bottom bracket?
During the last years cartridge bottom brackets took over and working with a classical, screwed bottom bracket does produce problems for an increasing number of people. In addition sportive bikes are increasingly equipped with press-fit bearings as BB30, PF30, …
In principle classical bottom brackets are a simple construction: right bearing shell, left bearing shell, lock ring, 2 ball rings, spindle with fixed bearing seats. However there are serious differences regarding the material used and the precision obtained. Furthermore there have been several bottom bracket shells and threads used. Down this page you will find a helpful table.
A well built, classical bottom bracket may, when proper installed and maintained, last for ages.
The picture below does show a Suntour GreaseGuard bottom bracket. Therefore this one is sealed to the inside too.

Before you are able to open such a bottom bracket you do have to remove both cranks. To do so use a specific crank removing tool that is screwed into the tread visible when caps and bolts are removed. To open the bottom bracket another set of special tools is required.
The standard tools are shown here:
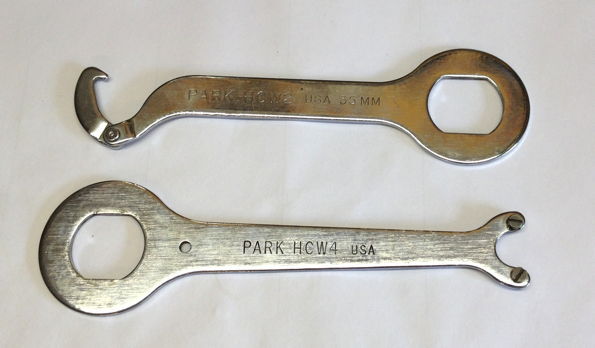
The hook wrench (above, left side) is available with or without hinge. Use this to remove the lock ring. The pin wrench (below, right side) does fit into the drillings within the left bearing shell. So this shell can be unscrewed easily. Both wrenches do have another side to be used for the right bearing shell. Usually 35 or 36 millimeter are used and this wrenches must be fitted very accurate to prevent slipping off. Attention: The right bearing shell is frequently very hard to get loose and there required direction differs.
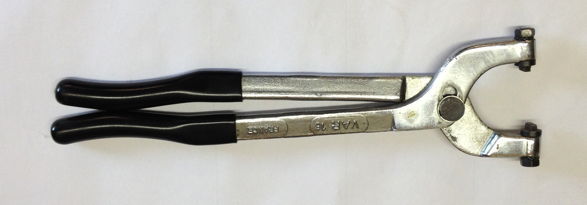
Professionals may use different tools. First a lock ring pliers.
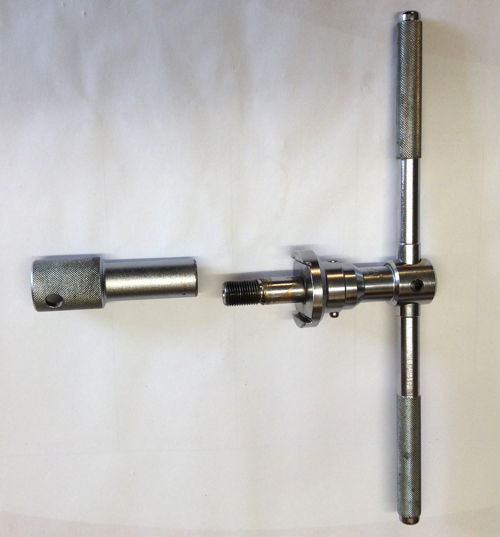
And then the speciall tool to remove the right bearing shell. Slipping off is prevented by securing the tool form the inside.
For disassembly remove the lock ring and the left bearing shell first. Now you are able to remove both ball rings and the spindle. If just a maintanance is intended stop here. All bits and pieces are accessible now and can be cleaned, checked and lubricated.
To reassemble the bottom bracket work backwards and do not forget to apply plenty of waterresistant grease. The bearing play is adjusted using the left bearing shell. Aim for no play but smooth action. Secure the adjustment by tightening the lock ring.
It is highly recommended to check this adjustment after cycling a few kilometers. When necessary do a readjustment.
Table showing the common bottom bracket norms
| name | thread | shell width | thread direction (left / right) |
|---|---|---|---|
| BSA | 1,370" x 24 tpi | 68 mm (rare 73 mm) | right / left |
| ITA | 36 x 24 tpi (1,42" x 24 tpi) | 70 mm | right / right |
| FRA | M35 x 1 (1,378" x 25,4 tpi) | 68 mm | right / right (rare right / left) |
